How to setup GA4 in WordPress and Joomla Websites

Below is a comprehensive guide on how to setup Google Analytics 4 on your WordPress and Joomla websites.
If you set this up to run alongside your existing Universal Analytics account, you will need to opt our of the automatic upgrade that google is planning to do on February 28th. To opt out you need to:
- Go to your Google Analytics account, click on Admin
- Under the Property column click on GA4 Setup Assistant
- Under ‘Automatically set up a basic Google Analytics 4 property’ click on the toggle button to turn off.
- Repeat this for any other views you have set up in your account.
Read more about the pros and cons of opting out here.
GA4 Setup
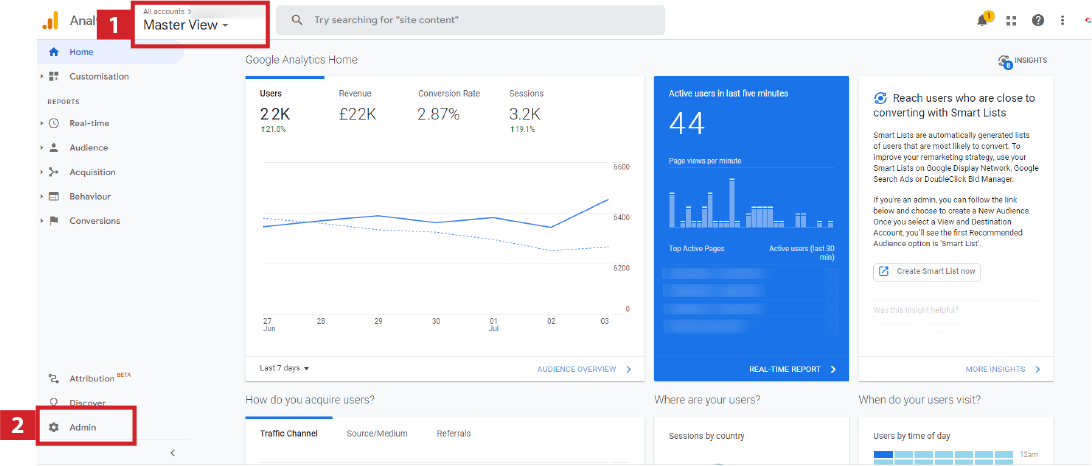
- Login to Google Analytics and select your account property
- Click on Admin
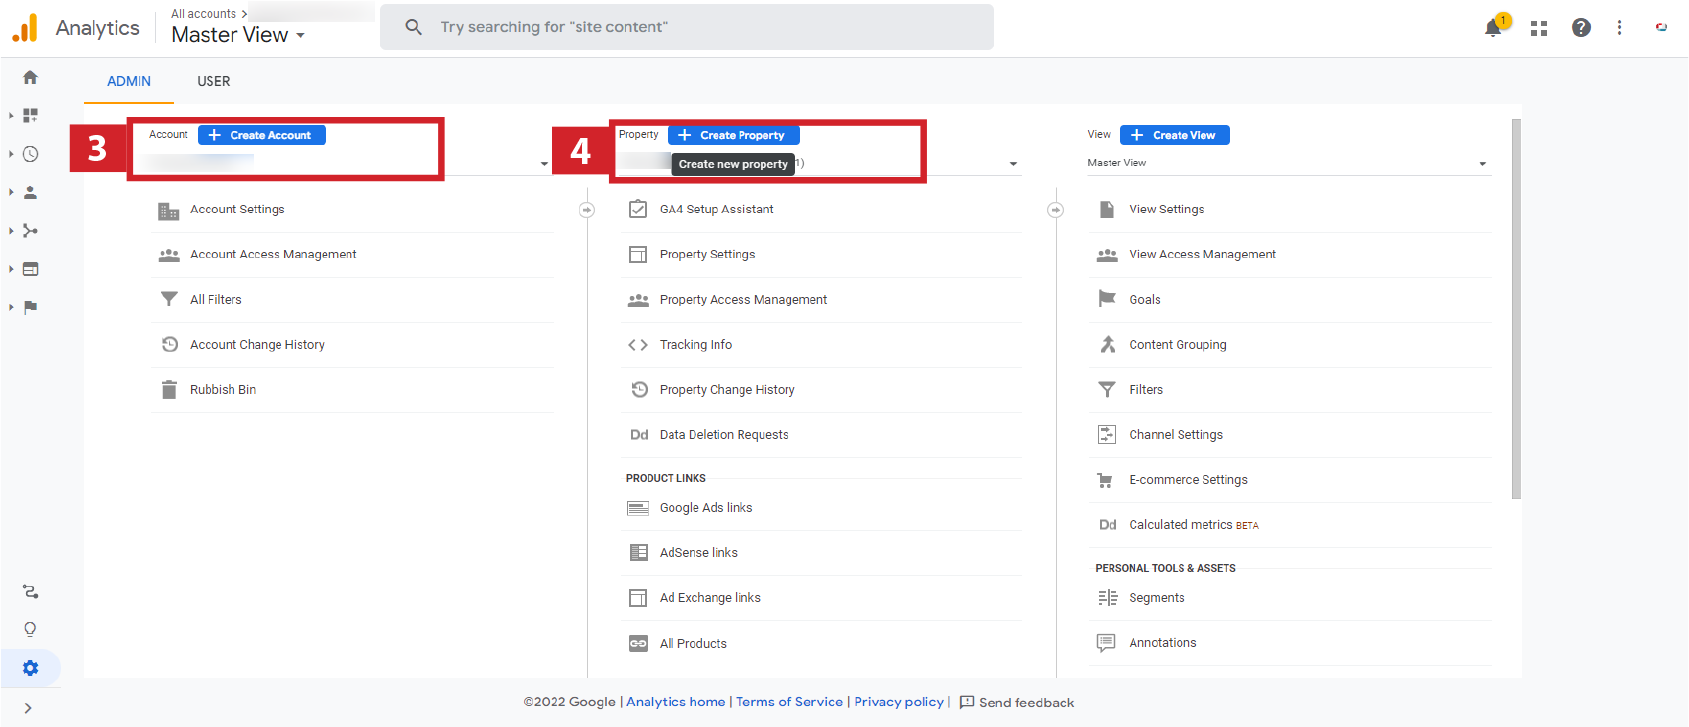
- Select account if not already selected (or create new account if it doesn’t exist)
- Create a new property
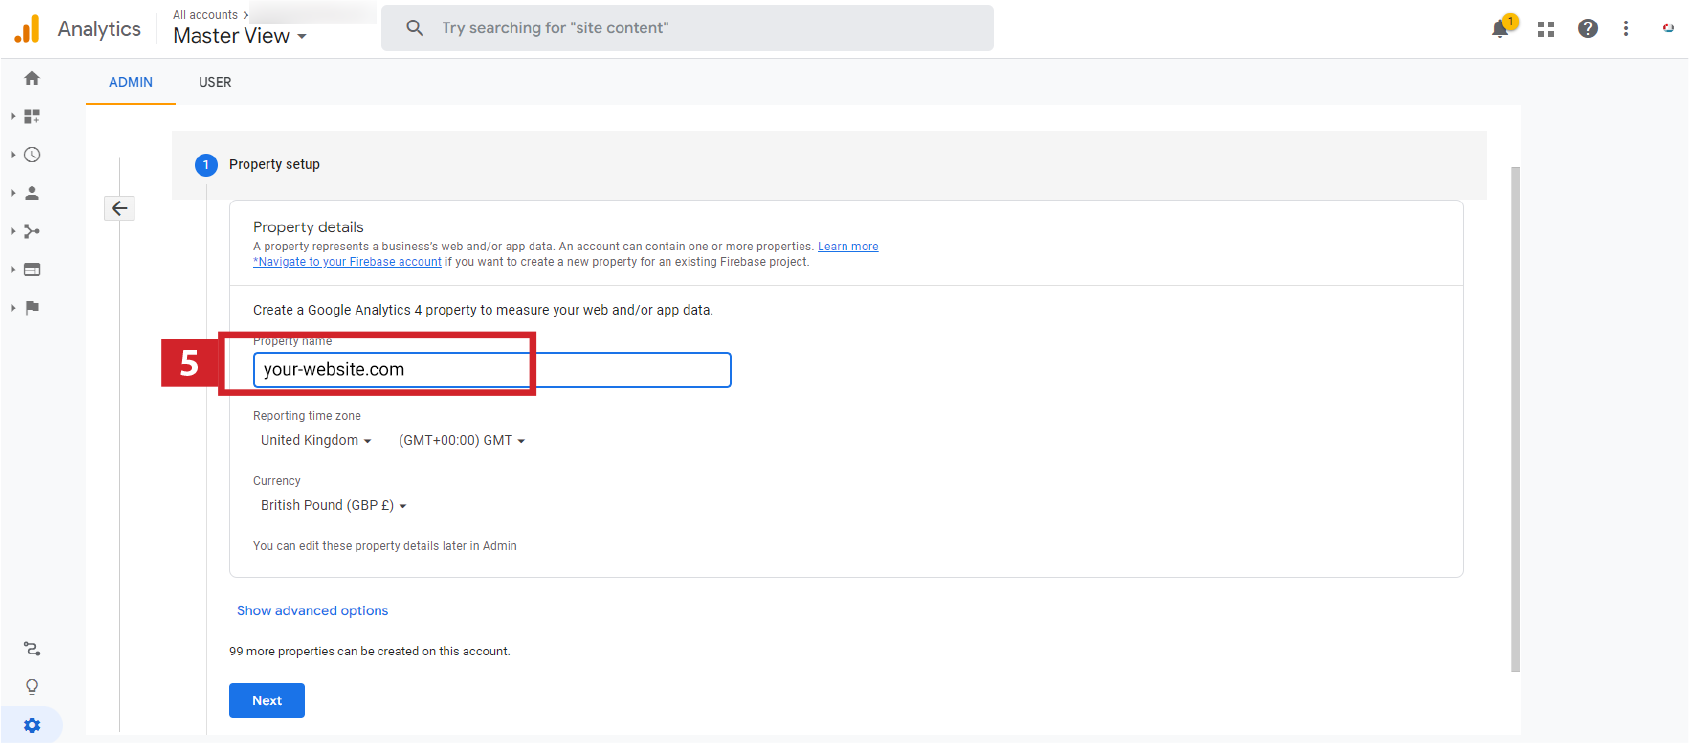
- Add your property name (we normally use the domain name without https or www - eg “your-website.com” but any descriptive name will do)
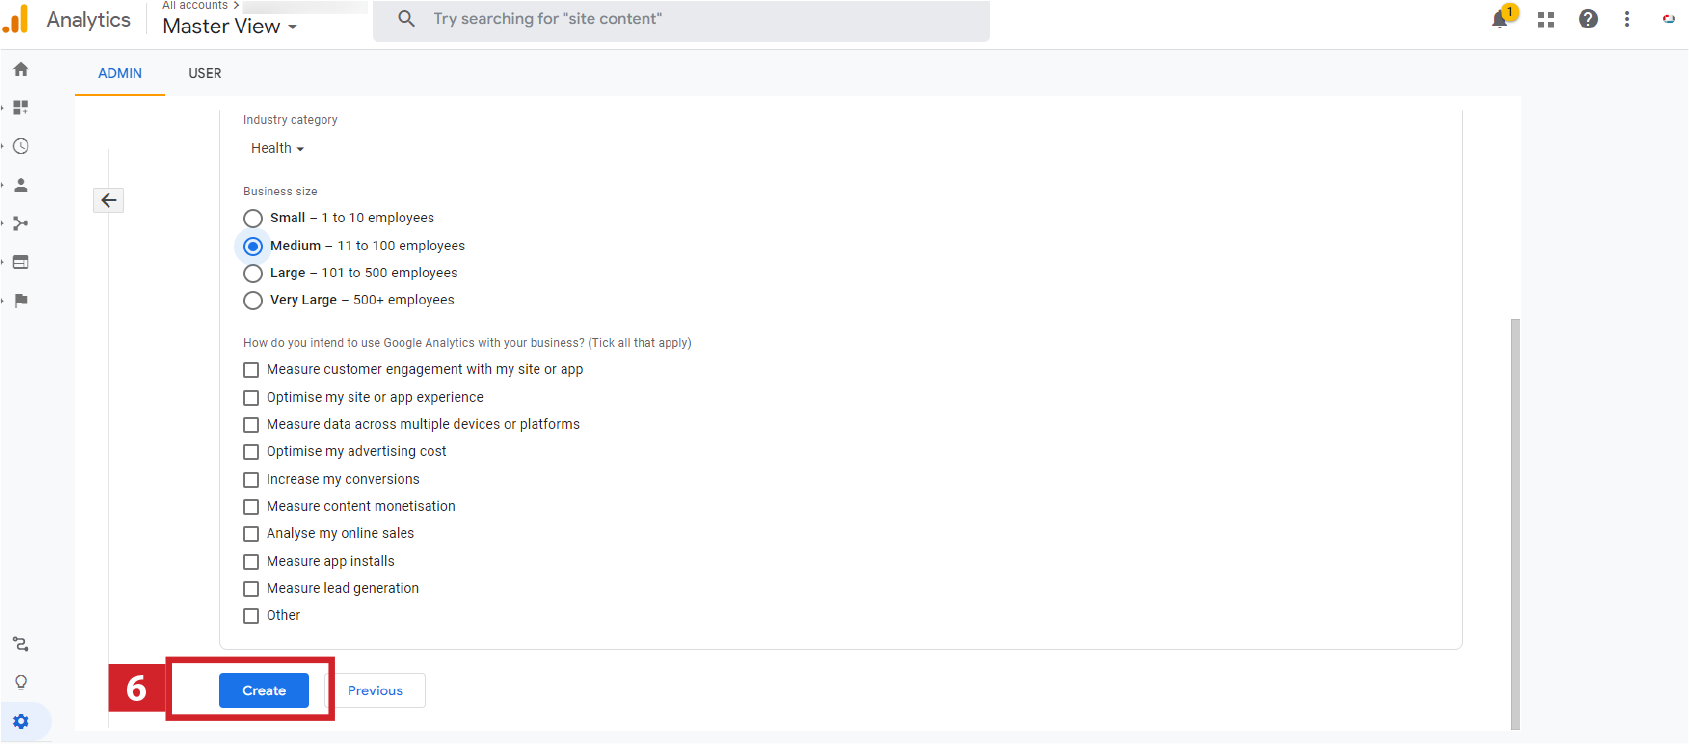
- Select appropriate options and click on Create
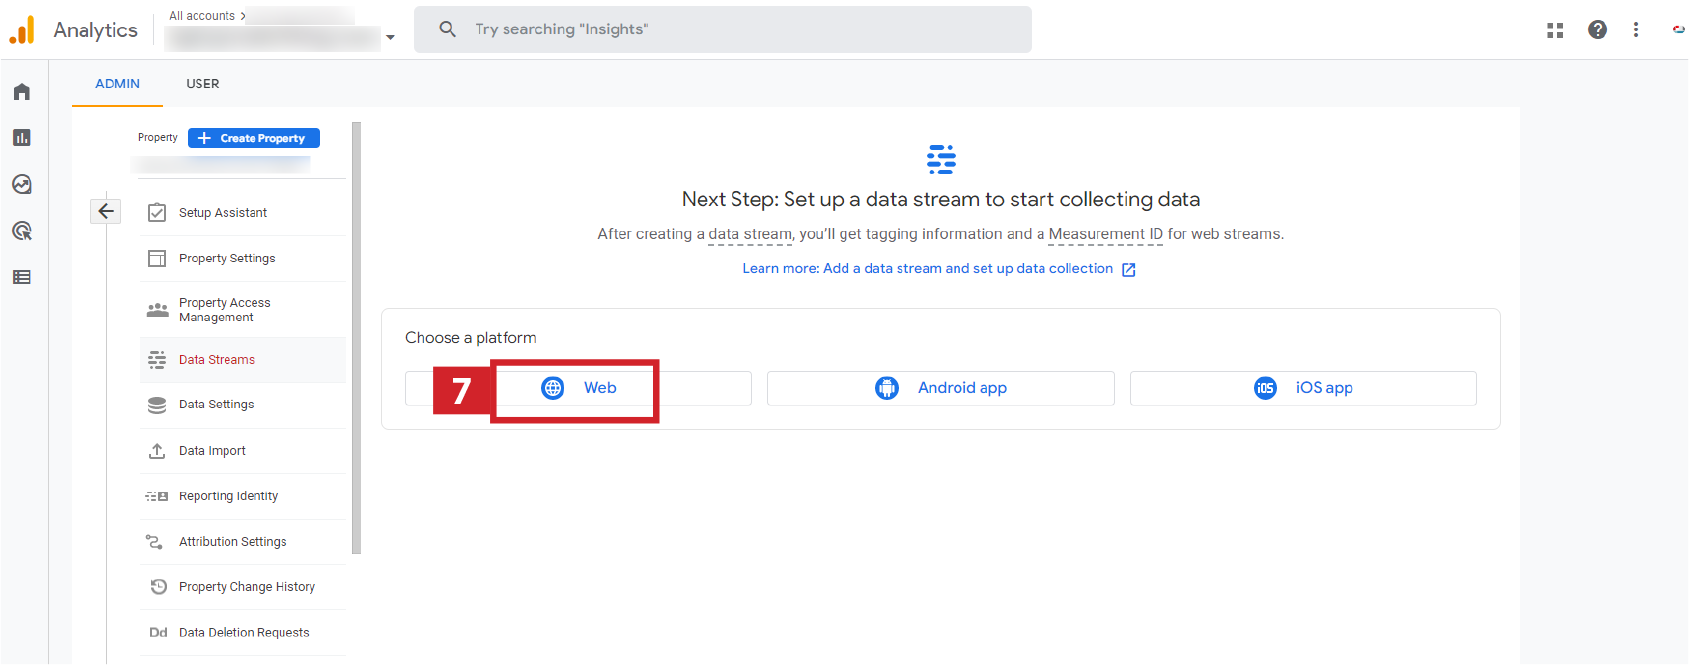
- Select relevant data streams. In this example we are using ‘Web’
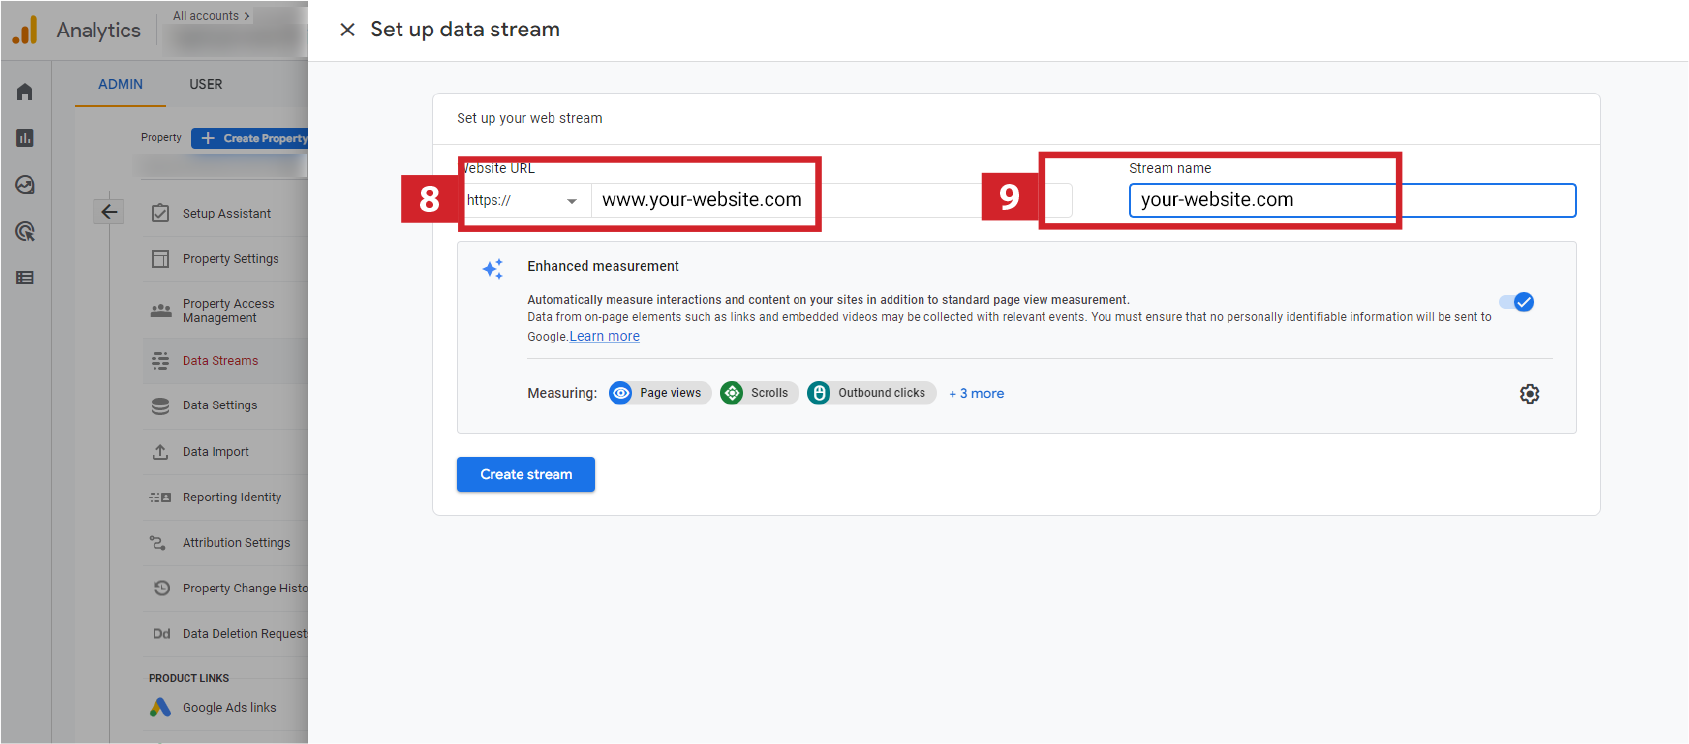
- Add your website URL. Some websites use www. before and some don't, check you have the right one!
- Add the Stream name - use the website address without www. here.
- Make a note of your measurement ID, you will need this later
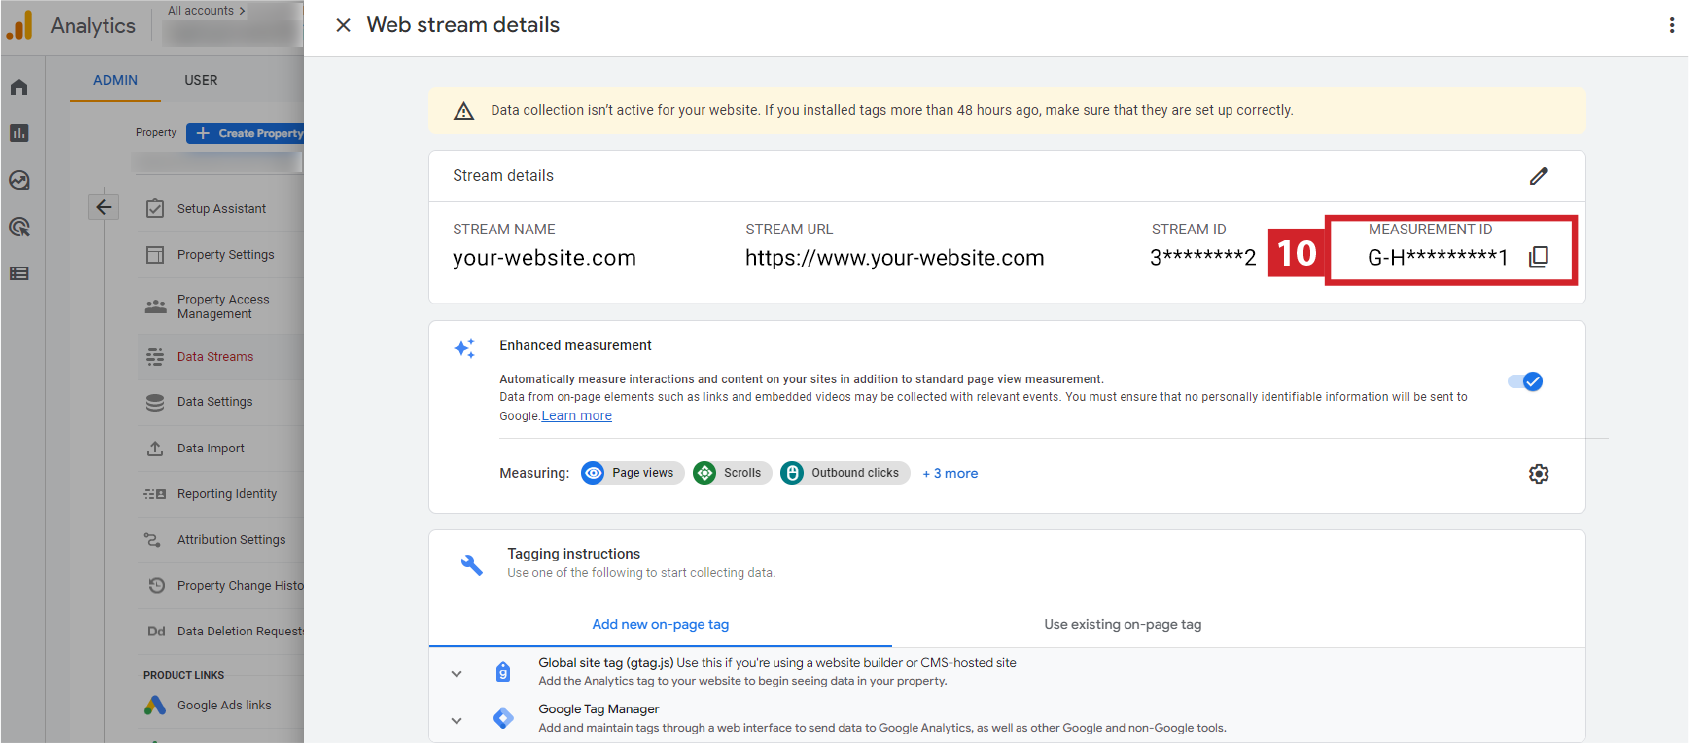
How to add GA4 to Google Tag Manager
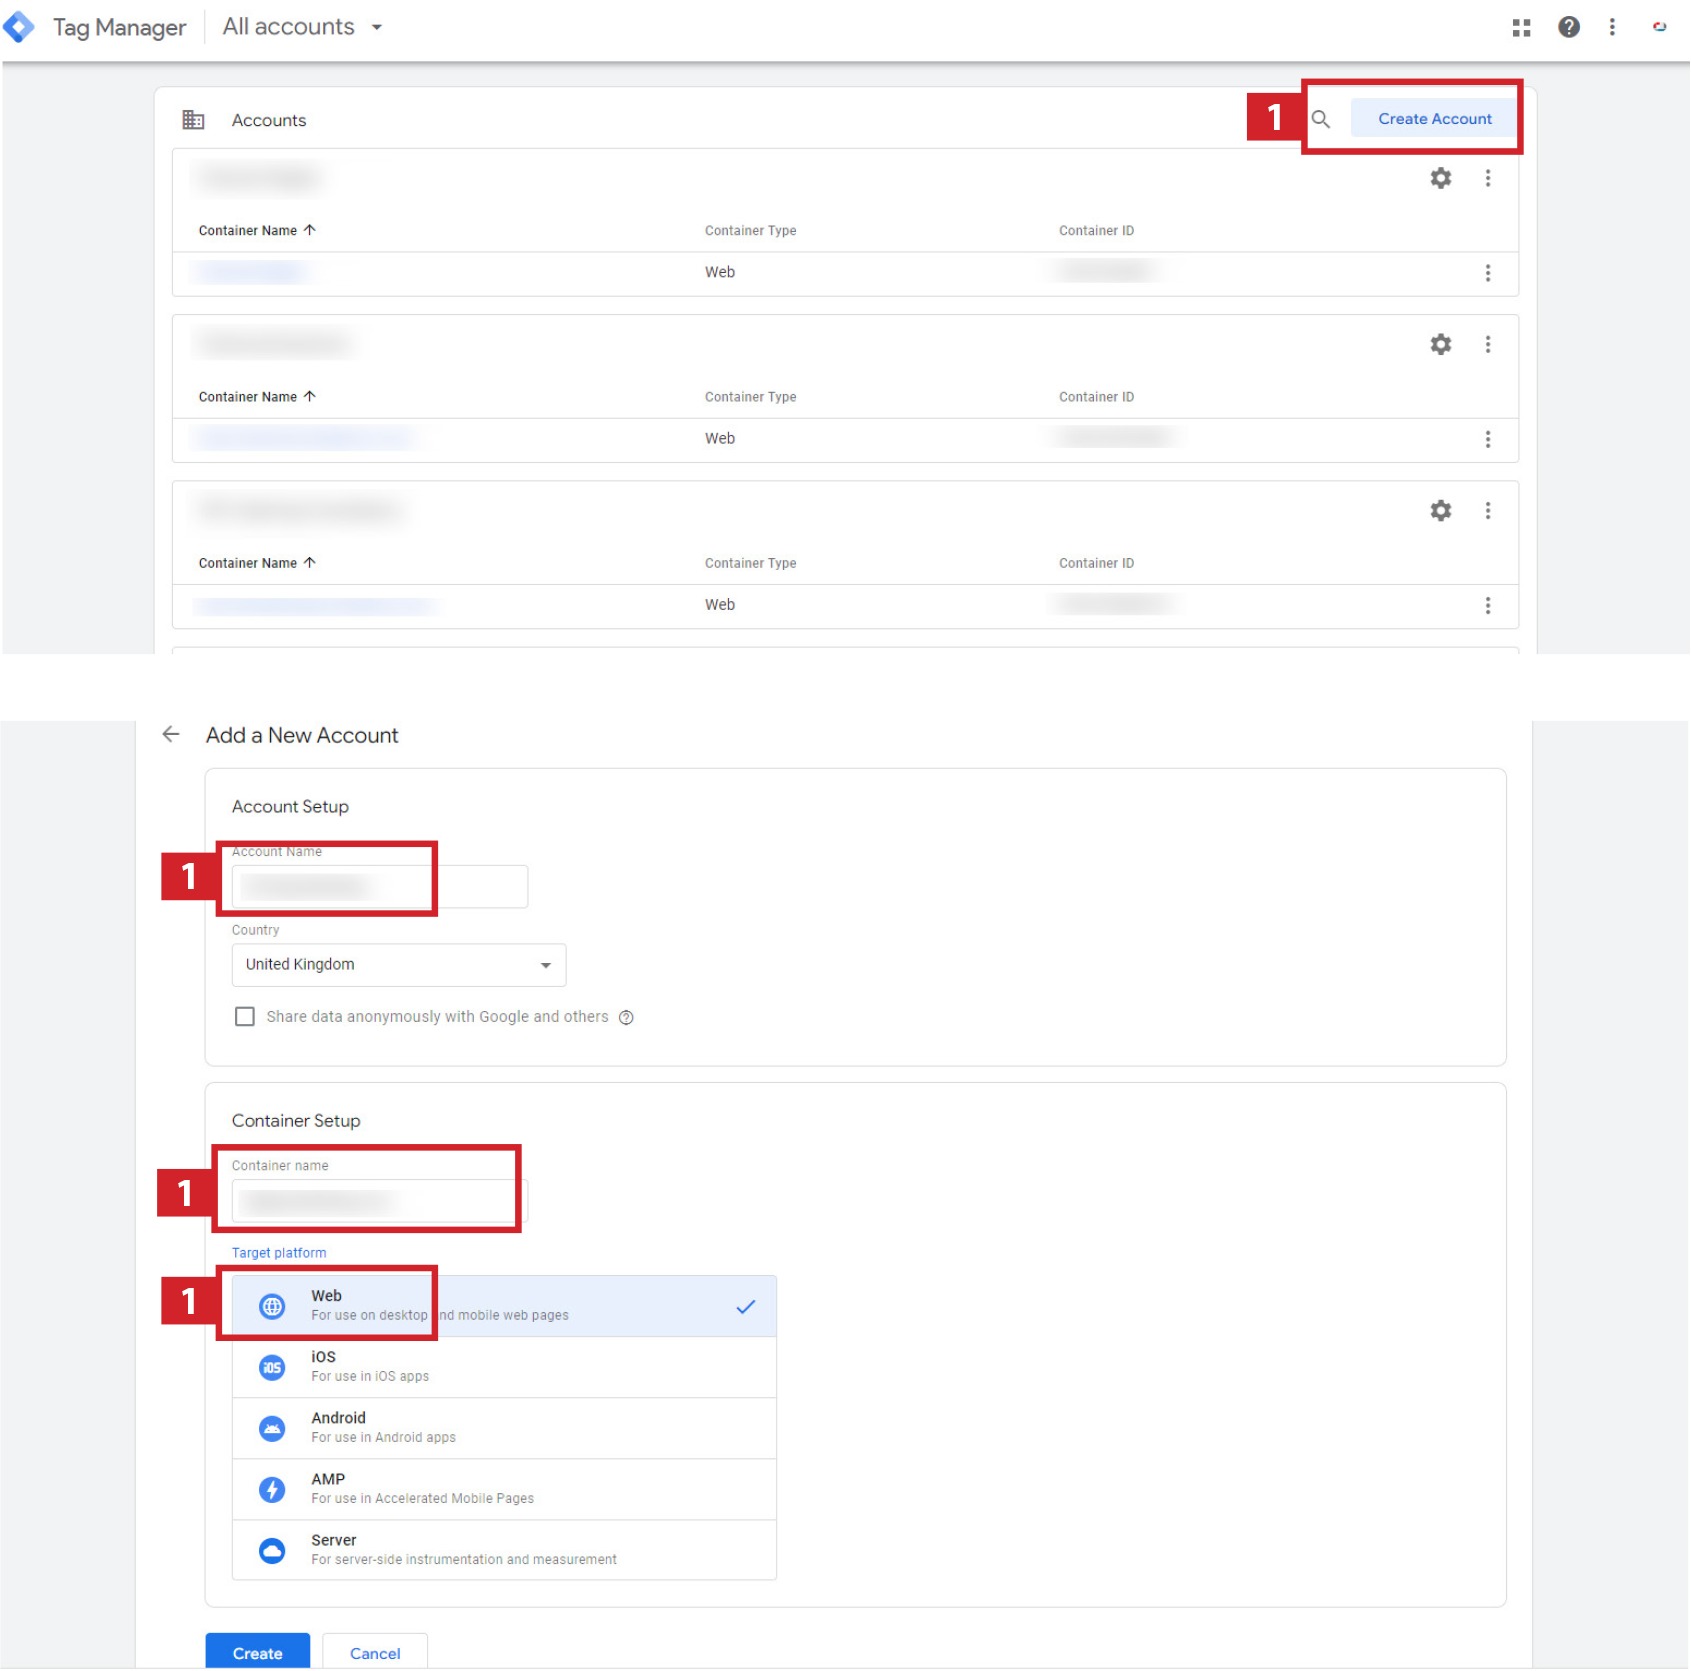
If you already have an account set up in Google Tag Manager, you can skip steps 1 to 3.
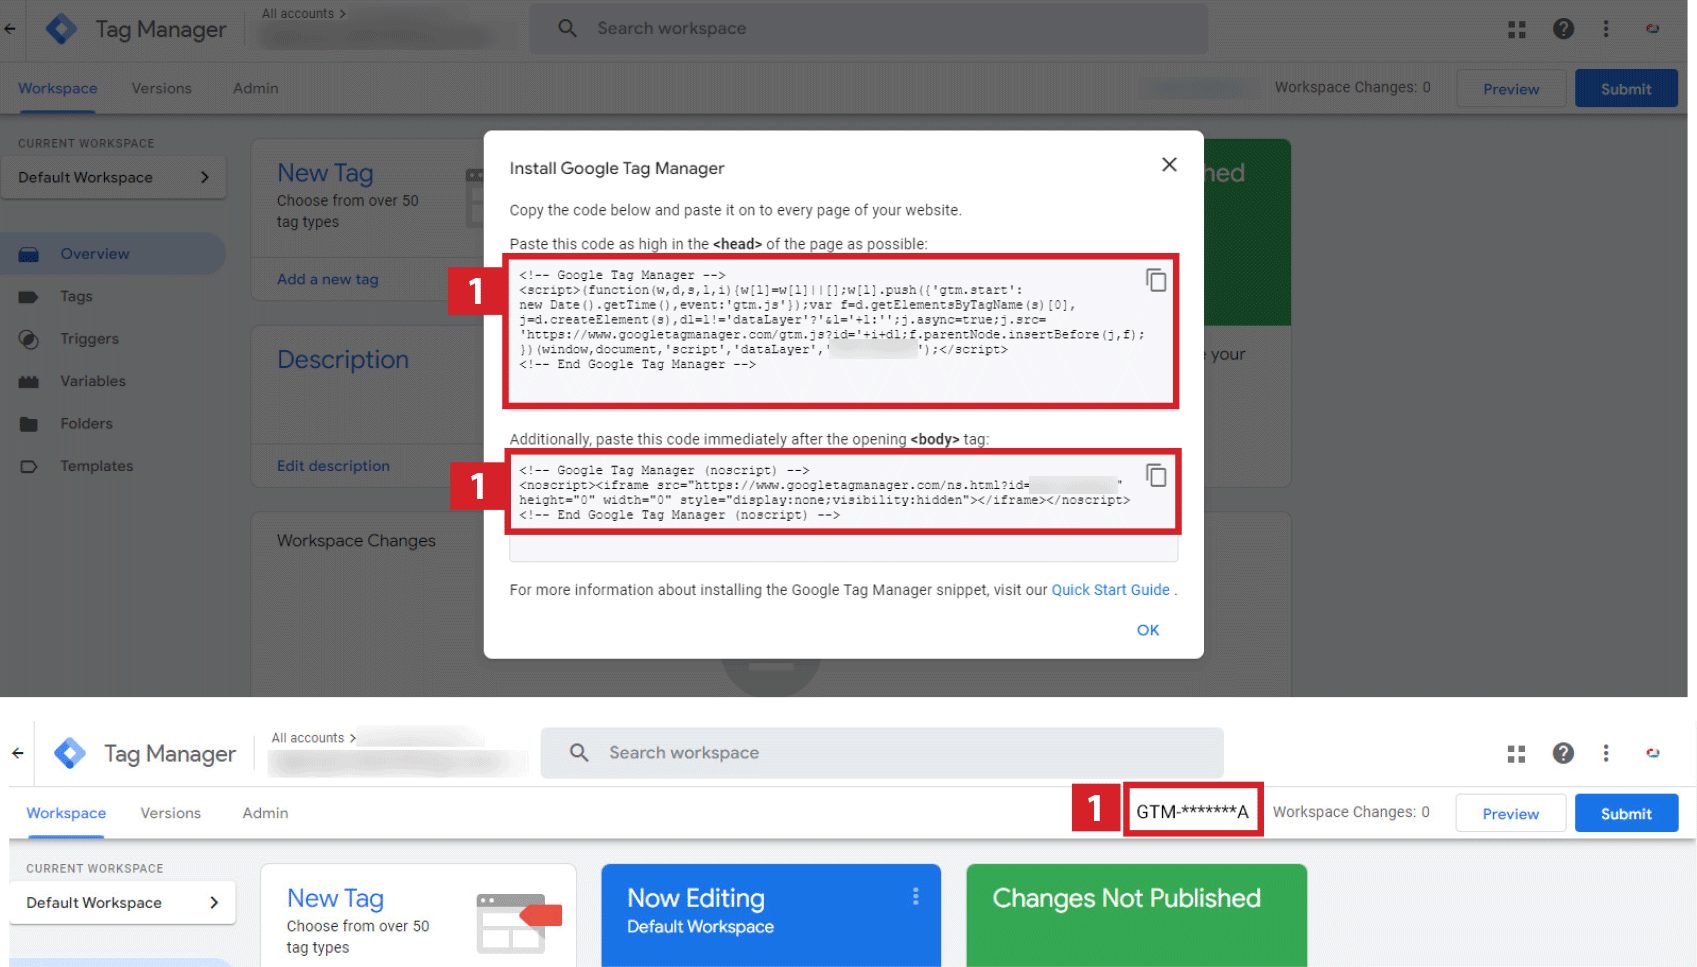
- If you do not already have an account, you can set one up here. Add your Account Name, Container Name and choose your target platform and click on create. In this example we are using Web. Then copy the code in the modal and save for later. Make a note of your TAG ID and save for later.
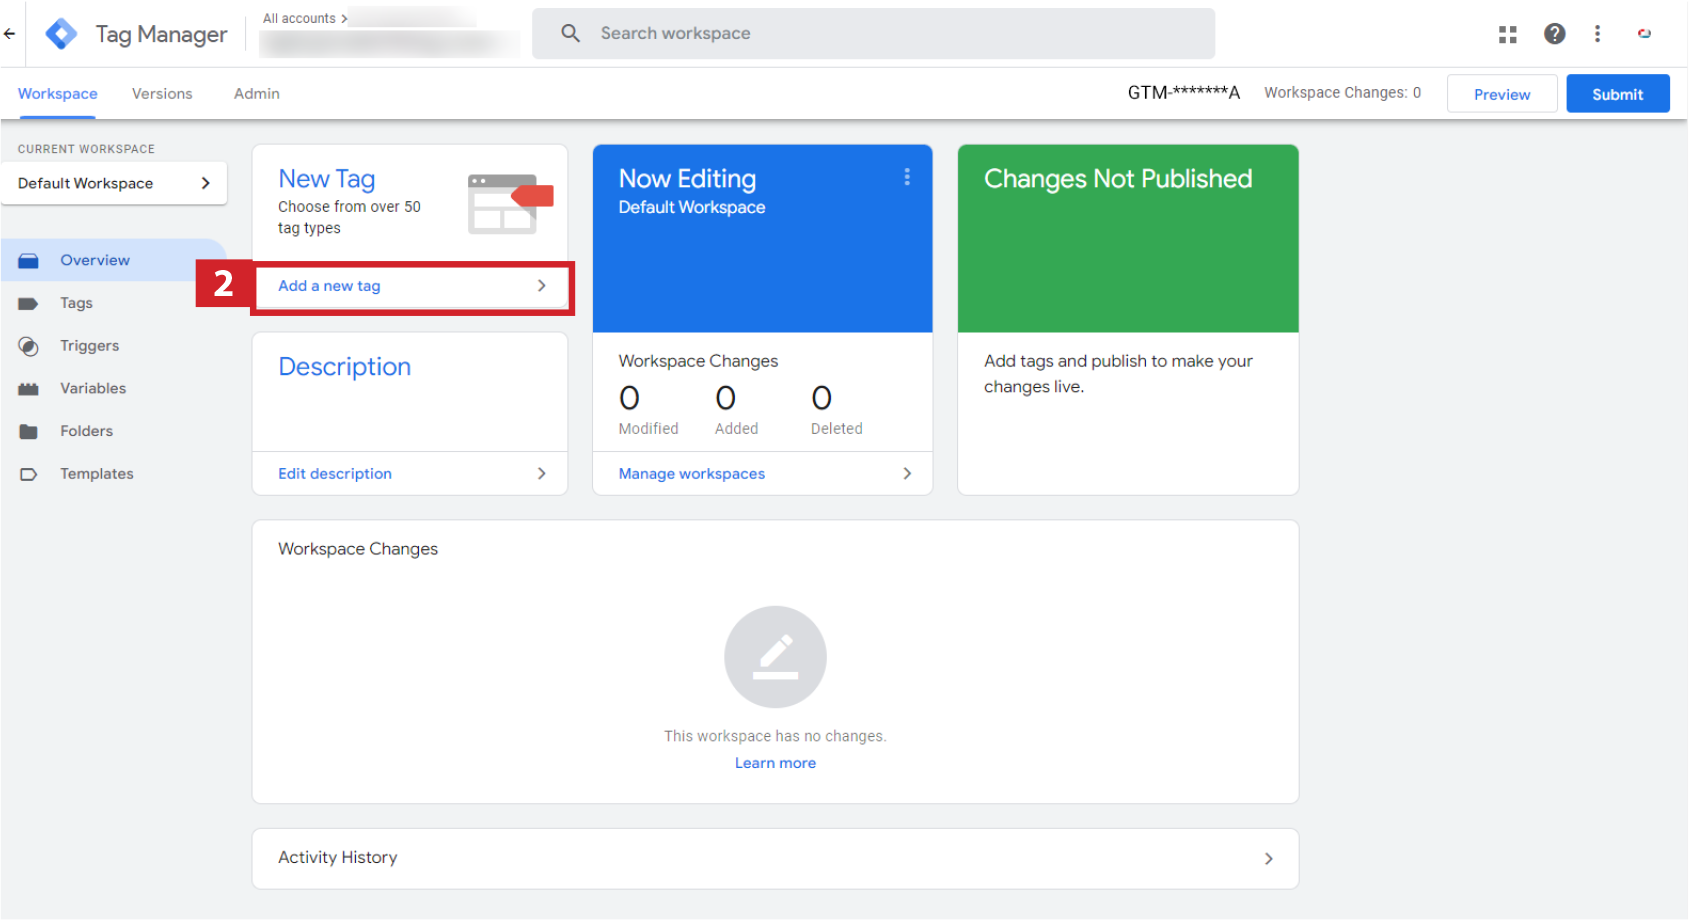
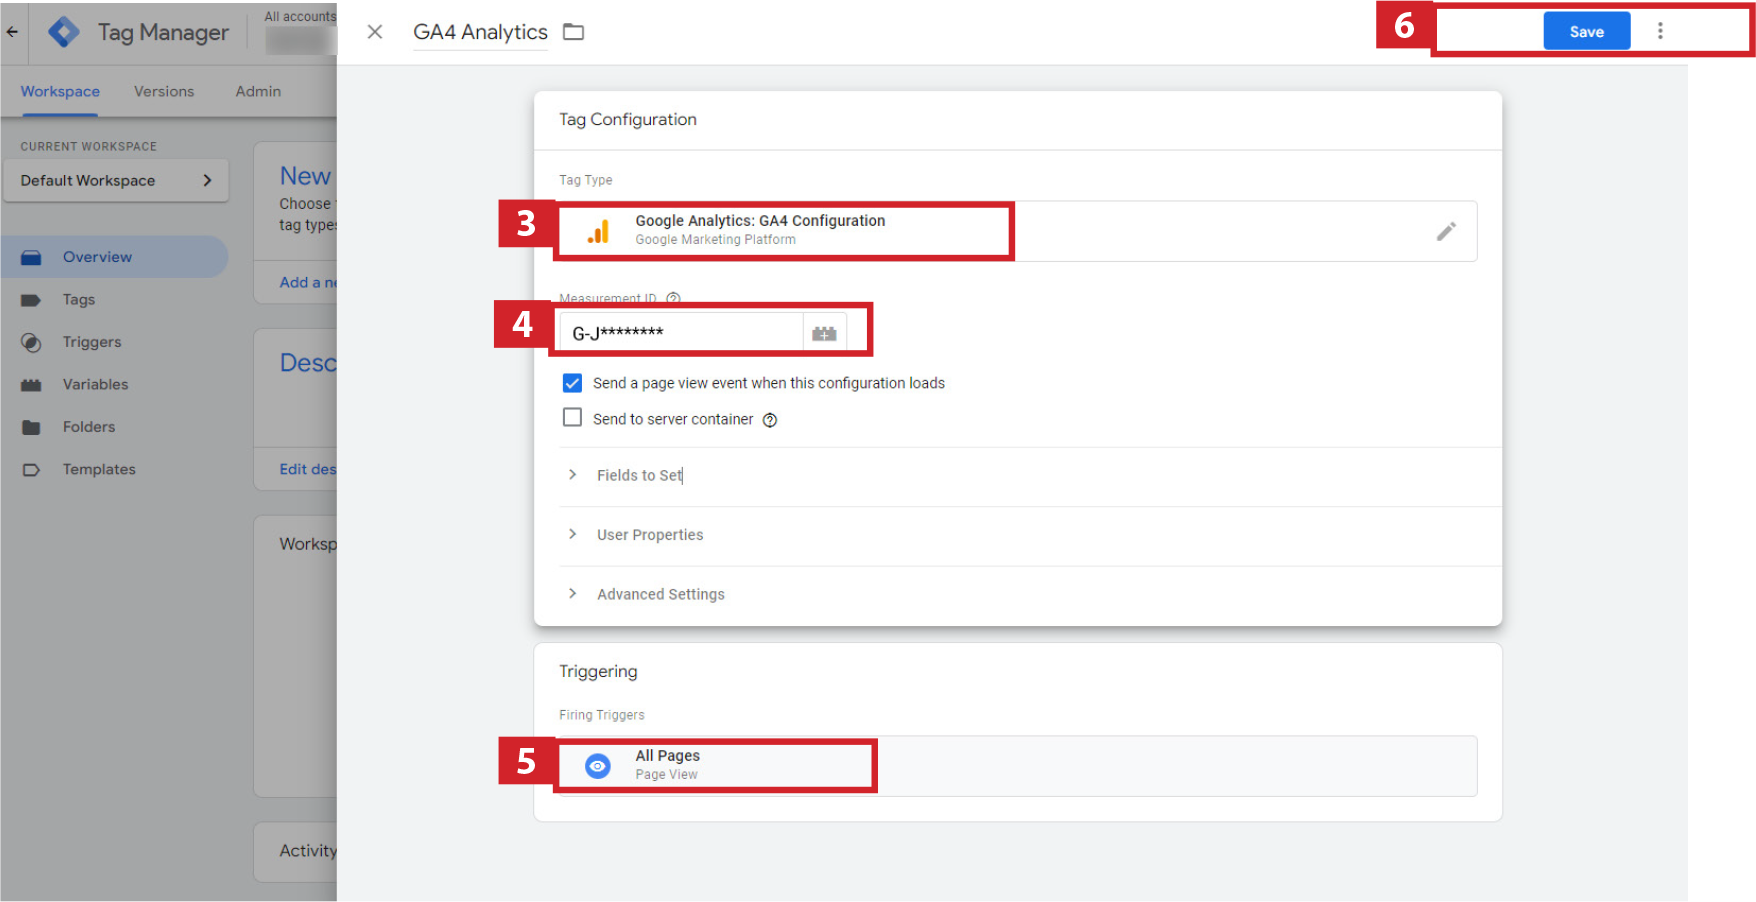
- Click Add a new tag
- Tag Type: select Google Analytics GA4 Configuration
- Paste in the Measurement ID from Google Analytics (see list number 10 saved above)
- Set Triggering to “All Pages”
- Click Save
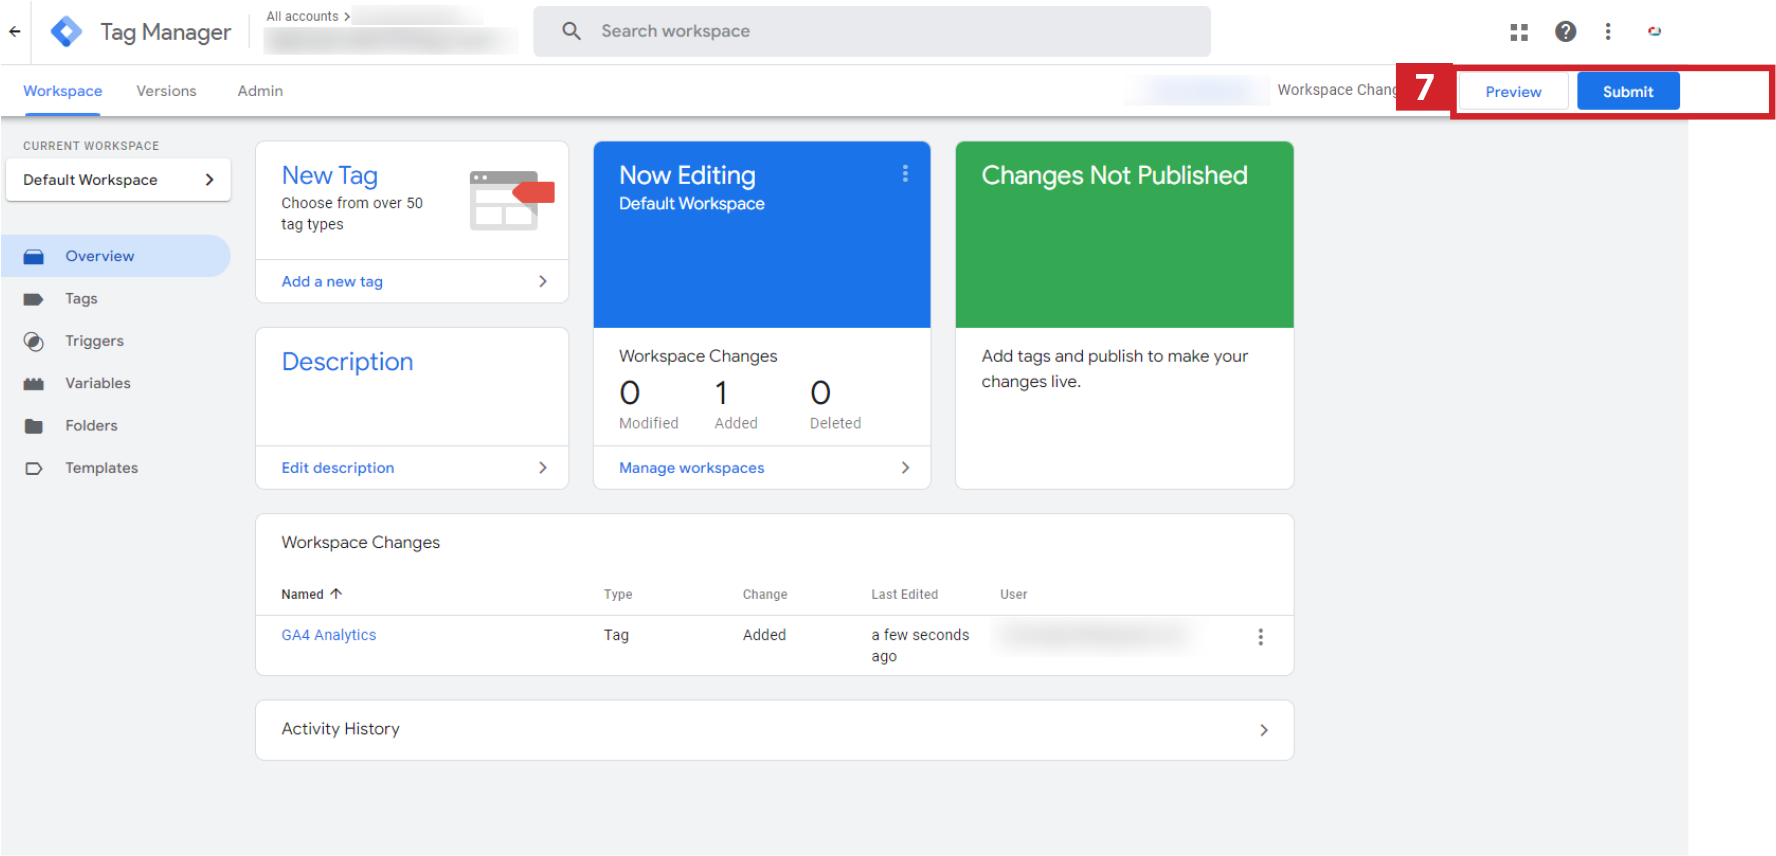
- Click Submit
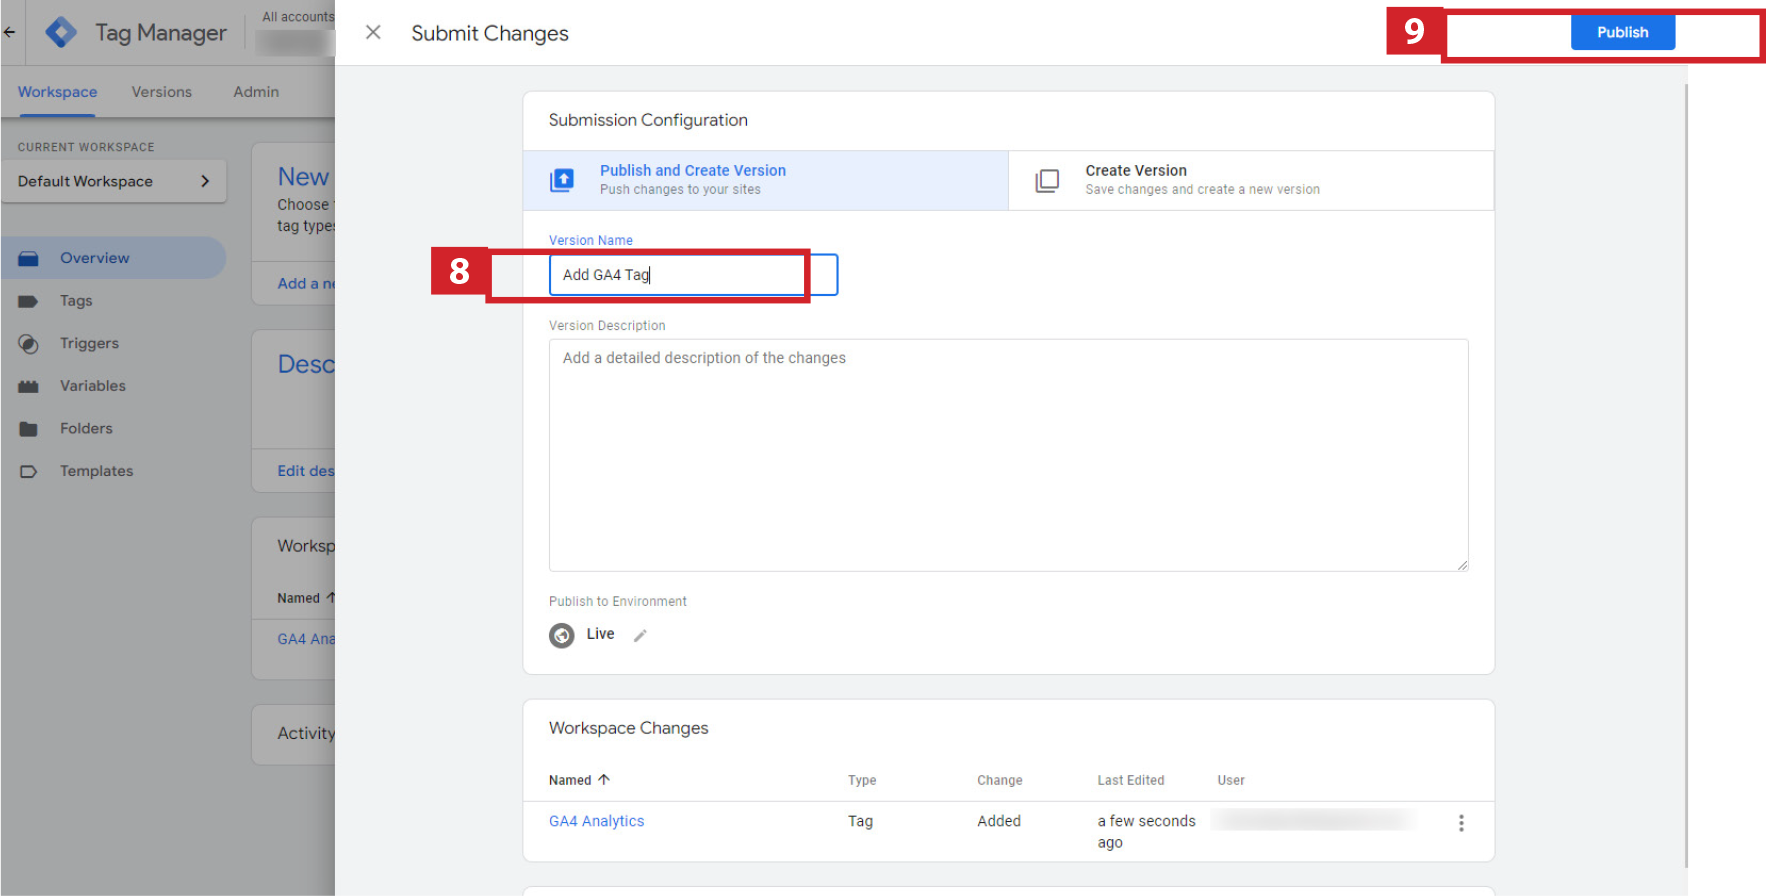
- Add small description for Version Name and
- Click Publish
How to add Google Tag Manager tracking code to your website
WordPress website using GTM4WP plugin by Thomas Geiger
There are a few different ways of adding the tracking code to your wordpress website, either using a suitable plugin or adding the tracking code directly to your theme template.
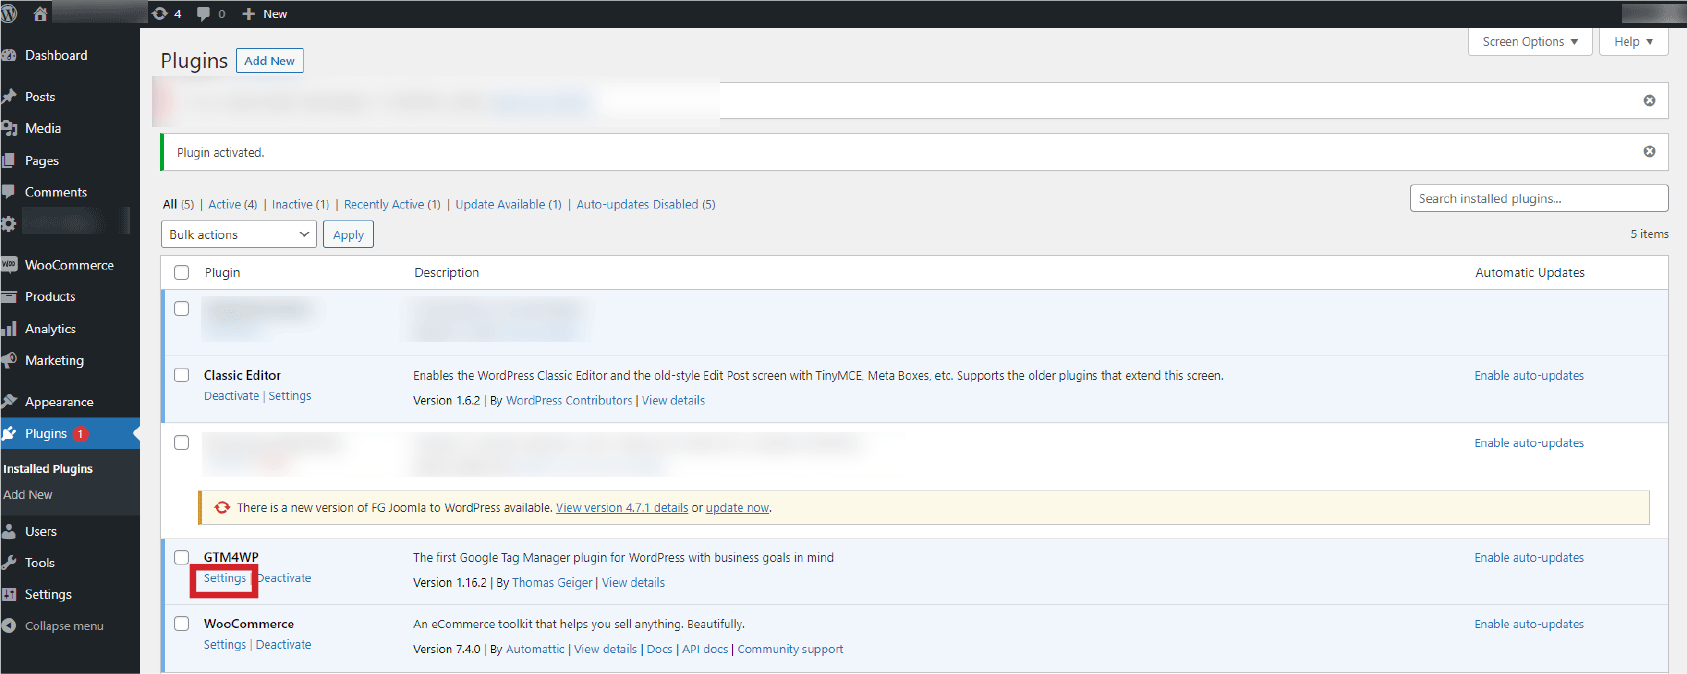
- Install and activate the GTM4WP plugin.
- Click Settings for GTM4WP in the plugin list view.
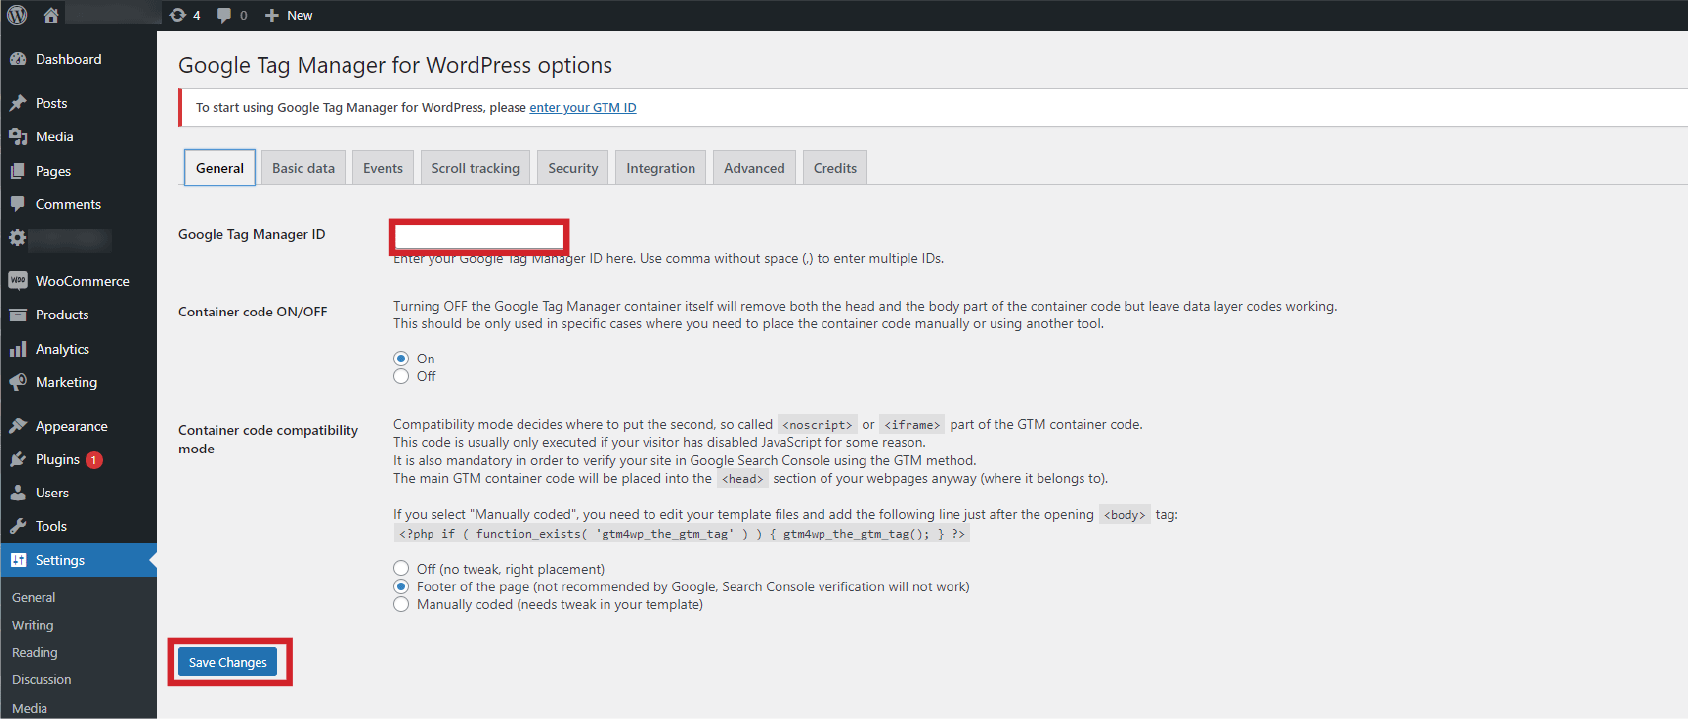
- Enter your Google Tag Manager ID and click Save Changes
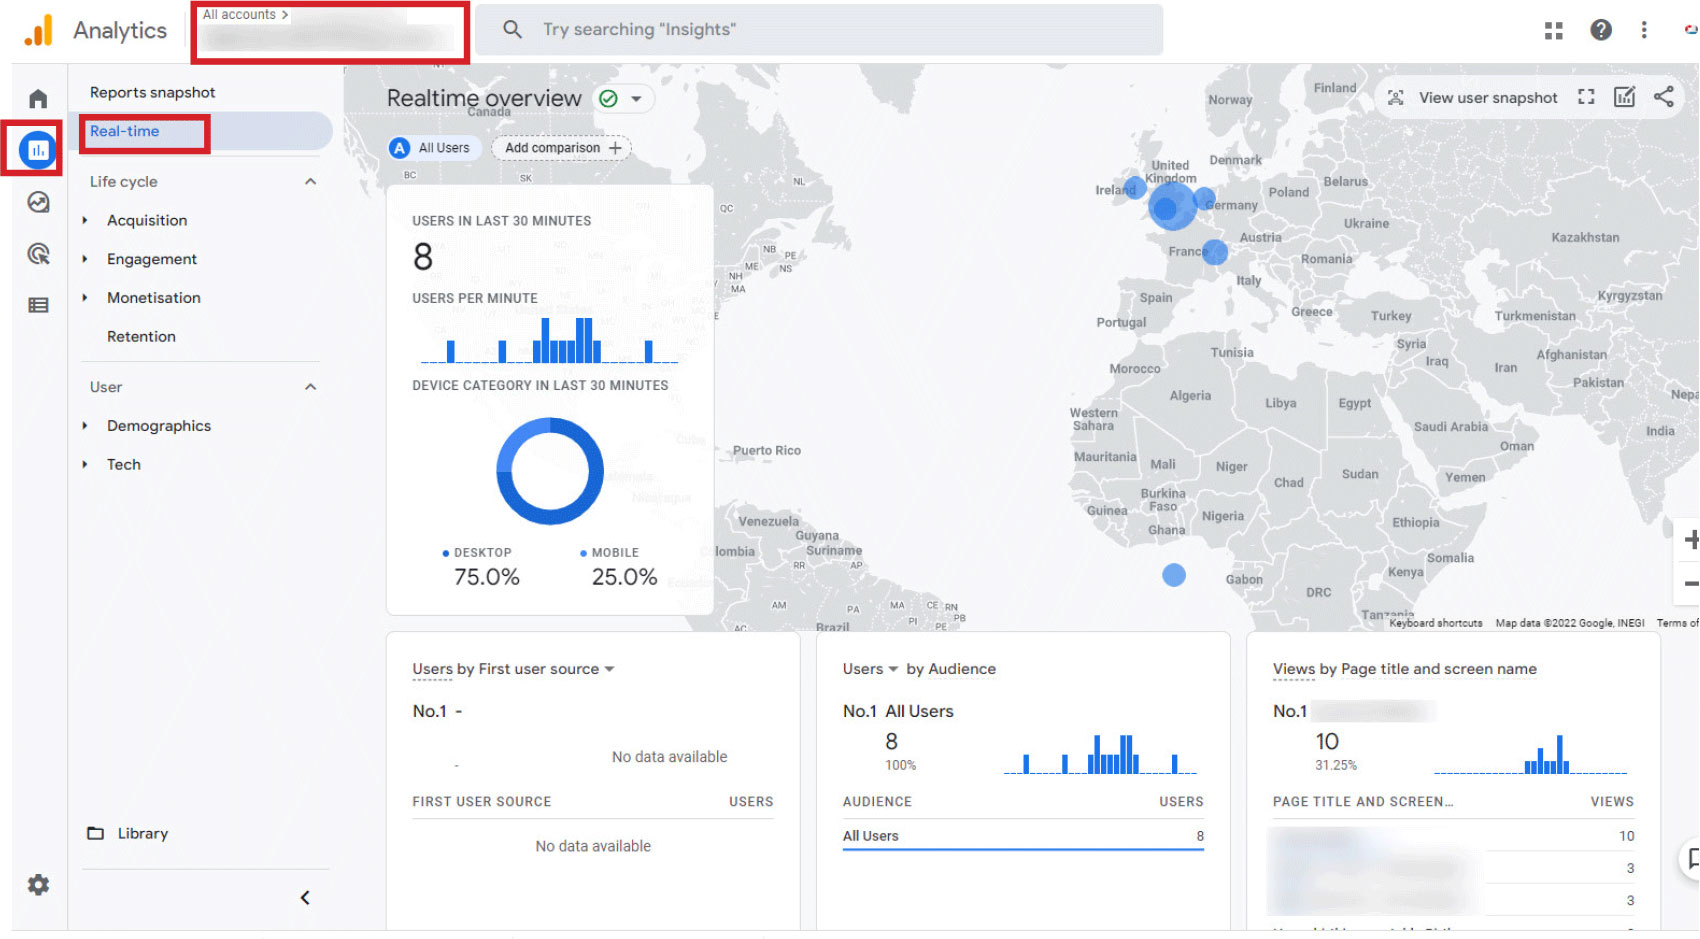
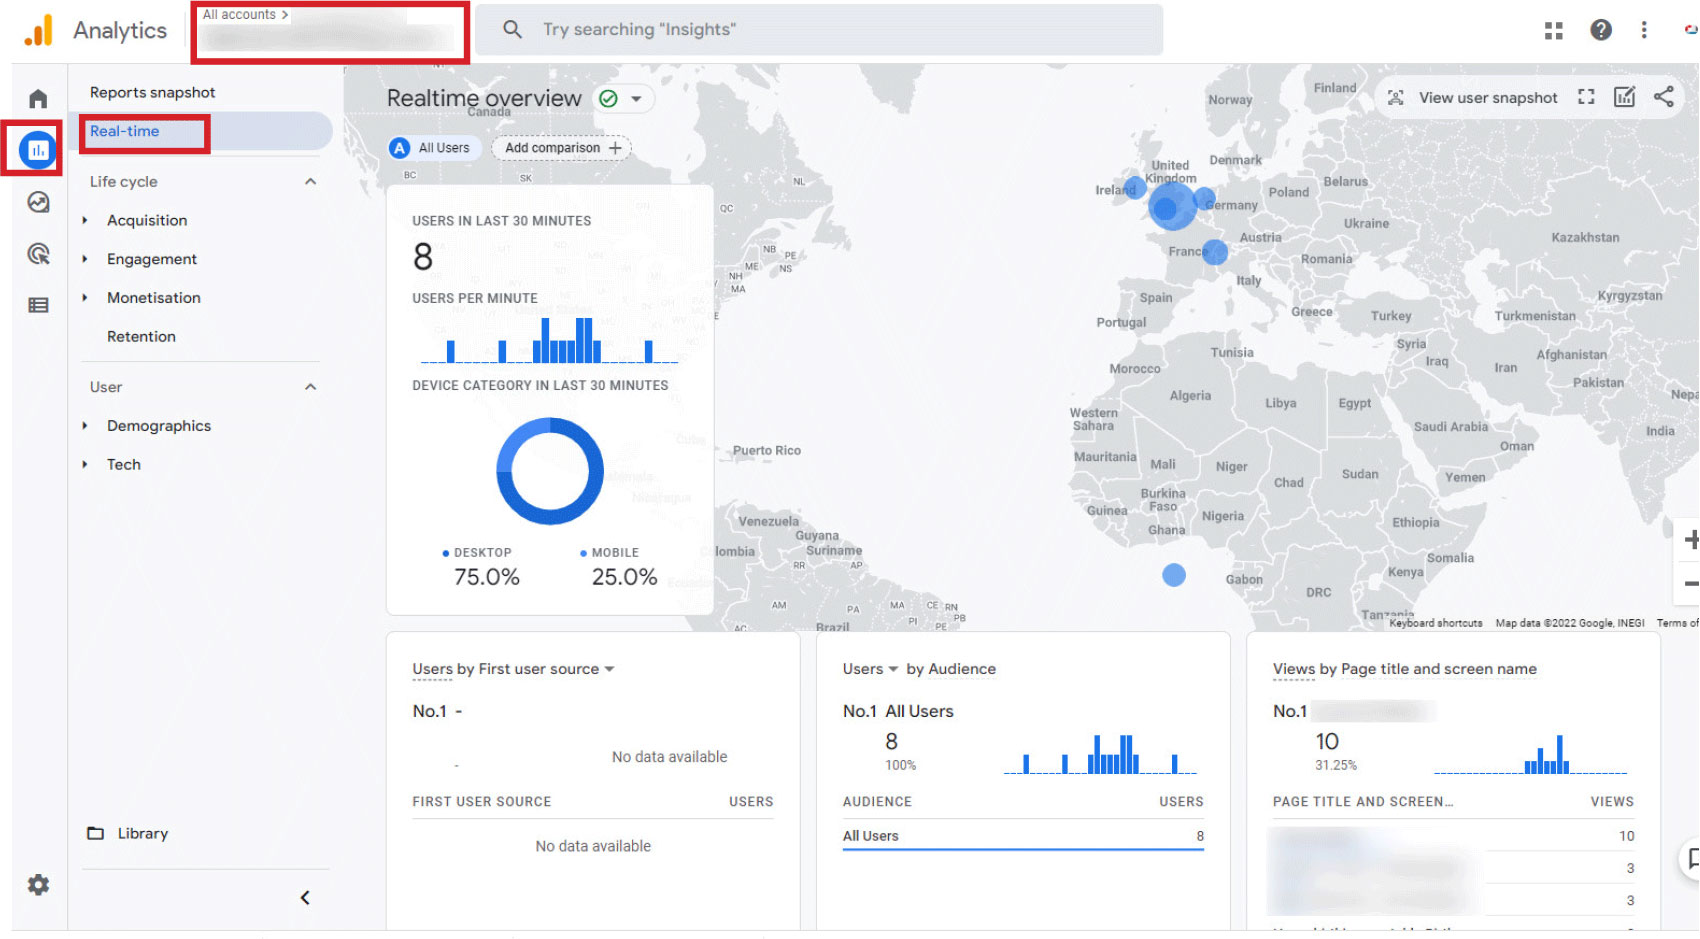
- Visit the website homepage. In a separate browser window/tab go to Google analytics dashboard, select the new GA4 property in the view drop down and select reports button and Real-time to see live traffic data. Confirm you can see visitor activity after a couple of minutes.
Joomla website using the Google Tag Manager plugin
- Install: https://extensions.joomla.org/extension/google-tag-manager/. Go to Plugins / Google Tag Manager
- Add GTM Container ID saved above in Google Tag Manager (item 1 TAG id). Click on Save
- Visit the website homepage. In a separate browser window/tab go to Google analytics dashboard, select the new GA4 property in the view drop down and select reports button and Real-time to see live traffic data. Confirm you can see visitor activity after a couple of minutes.


Every site will be unique in it's configuration and variety of plugins. Occasionally you may find a conflict with a plugin which could cause a bugs. Our recommendations use well tested plugins but if you have any issues please do contact us.


